

Getting out the door with confidence starts with five things: a sensory kit, a visual schedule, a named exit plan, an ID/contact card, and your child’s favorite snack. Add reliable hearing protection to that list, and you have covered the biggest predictors of a good outing versus a hard one. None of it guarantees a perfect day, but this autism friendly outings checklist stacks the odds heavily in your favor.
Here’s your must-have, grab-and-go list before you read further:
- Sensory kit: earmuffs, fidget, chewable, or weighted lap pad
- Visual schedule or first/then board showing the outing’s steps
- A named exit plan with a specific retreat spot
- ID/contact card in case you get separated
- A favorite snack that never changes
- BANZ hearing protection accessible in an outer pocket, not buried in the bag
Pro Tip: Build in “do nothing” time. Advocates who study sensory-friendly outings warn that over-scheduling every minute backfires because it removes the child’s ability to set the pace, which speeds up sensory fatigue instead of preventing it.
A printable version of this checklist, plus a longer packing list and two sample timelines, follows below.
Key Takeaways
Successful autism-friendly outings depend on three planning pillars, off-peak research, a named retreat spot, and visual supports, backed by a go-bag matched to your child’s sensory profile.
| Point | Details |
|---|---|
| Plan around three pillars | Research off-peak hours, identify a sensory retreat spot, and prepare visual supports before you leave. |
| Pack a dedicated go-bag | Keep sensory tools, comfort items, snacks, and documents in labeled pouches for fast access. |
| Name your exit plan | Decide on a specific retreat spot before arrival so you’re not searching for one during a meltdown. |
| Build in child-led time | Avoid over-scheduling; unstructured time prevents faster sensory fatigue. |
| Choose gear built for real use | BANZ hearing protection and UPF 50+ sun hats are designed for extended, active wear during outings. |
Table of Contents
- Detailed Packing and Preparation Checklist
- How Do You Research a Venue Before an Autism-Friendly Outing?
- What Should You Do When You Arrive at the Venue?
- How Do You Handle a Meltdown or Shutdown During an Outing?
- Building Visual Schedules and Social Stories for Outings
- Choosing Activities and Pacing the Day
- Essential Gear for Autism-Friendly Outings
- Two Sample Timelines: Short Park Trip and Longer Museum Visit
- How Do You Debrief After an Autism-Friendly Outing?
- Editorial Perspective: What Actually Moves the Needle
- Where BANZ Fits Into Your Next Outing
- Frequently Asked Questions
- Sources
Detailed Packing and Preparation Checklist
The go-bag is the single most useful tool in your autism outings kit. Pack it once, keep it stocked, and you remove a huge source of morning stress.
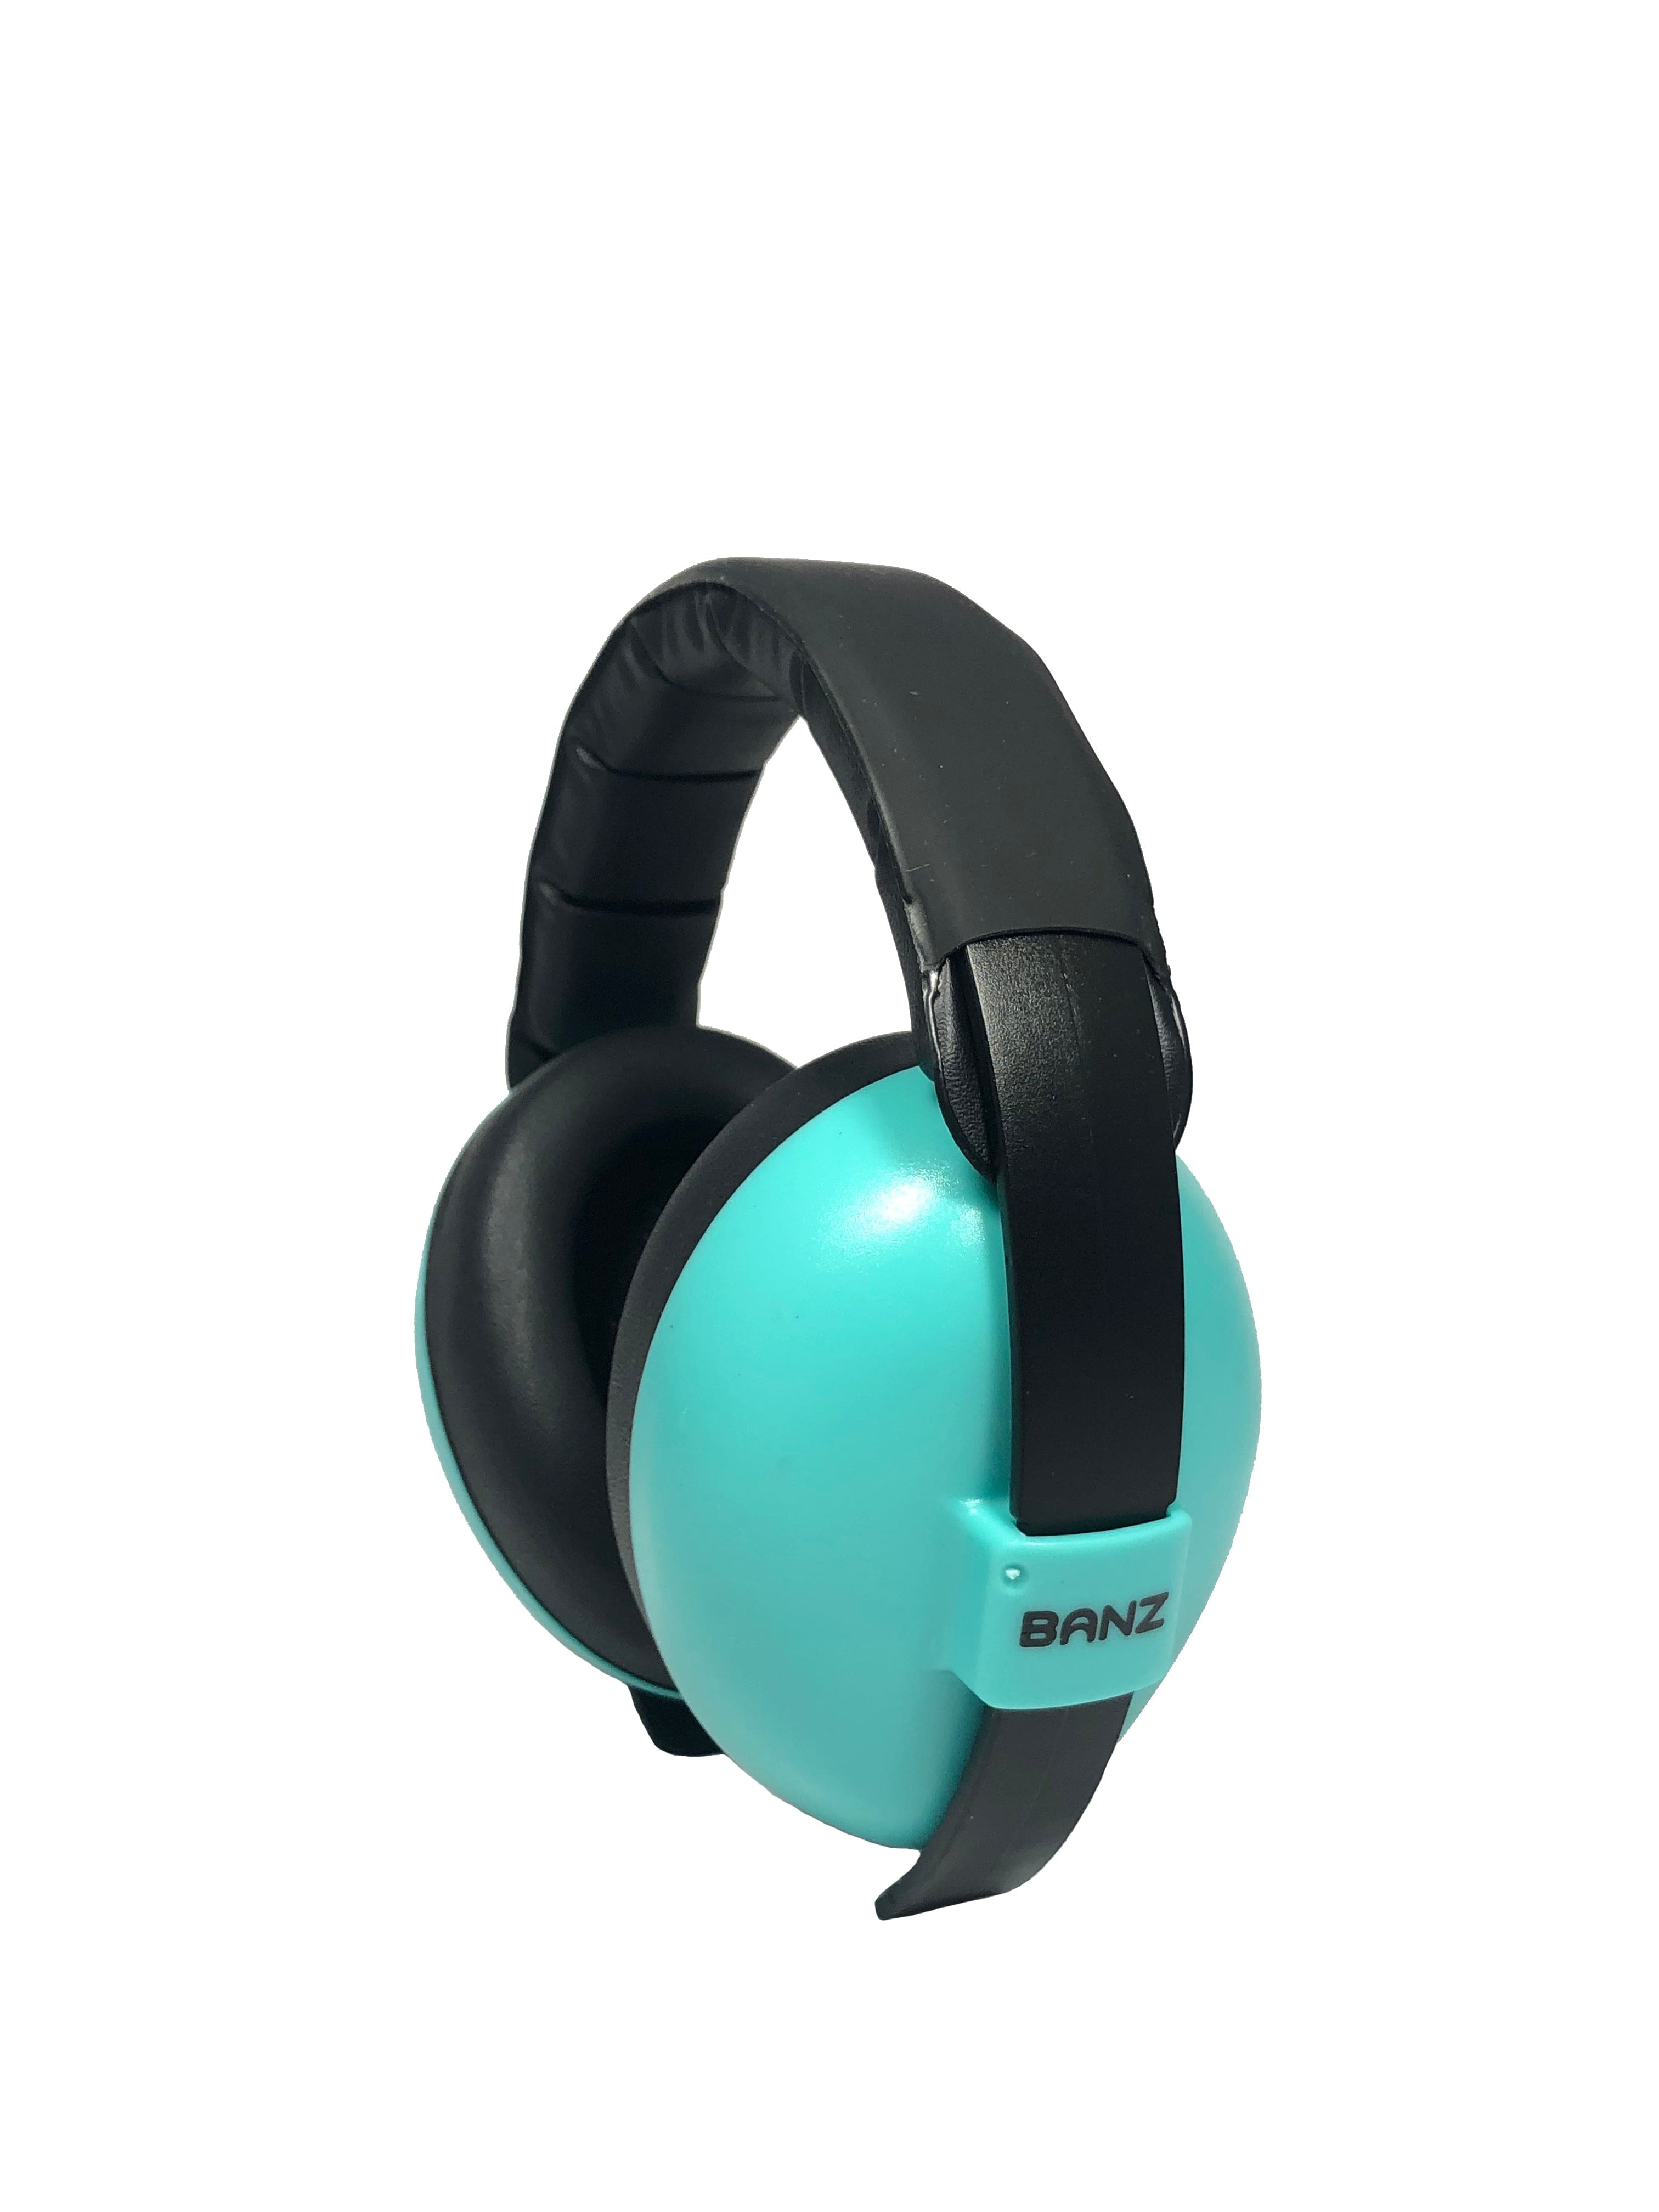
Sensory tools. Noise-canceling or noise-reducing earmuffs top this list for good reason. A go-bag built around a visual schedule, social story, and an accessible pair of noise-reducing earmuffs shows up repeatedly in outing planning guidance because sound is one of the fastest triggers for overload in loud venues. Pack fidgets and chewable jewelry for oral or tactile regulation, and consider a compact weighted lap pad for car rides or waiting periods. It applies gentle, even pressure that some kids find calming during transitions.
Comfort items. One familiar object, a small stuffed animal, a specific blanket corner, a worn t shirt, does more to anchor a child than three new toys combined. Don’t swap it out for something “better” right before an outing.
Food and hydration. Bring a snack you know your child will eat, even if the venue sells food. Unfamiliar smells and textures at concession stands can be a sensory ambush on their own.
Medical and first-aid basics. Any daily medication, a small first-aid kit, and sunscreen if you’ll be outdoors. If your child has a medical ID bracelet, check it’s current.
Documents and IDs. A laminated contact card with your phone number, your child’s name, and one line about communication needs (for example, “may not respond verbally, please get a parent”) speeds up any separation scenario.
Tech and chargers. A charged phone, a portable charger, and if your child uses a communication app or calming videos, download content ahead so you’re not relying on venue WiFi.
Clothing and weather gear. A change of clothes, weather-appropriate layers, and a sun hat matched to the season. UPF 50+ protection matters more on outdoor outings than most parents realize.
Retreat items. A lightweight blanket or foam mat that turns any bench or patch of grass into an instant decompression zone.
Organize with small zip pouches labeled by category, sensory, medical, snacks, so you’re not digging through a full bag during a meltdown. A step-by-step packing template built specifically for outings with autistic kids can help you build your own compact version.
Match every item to your child’s actual sensory profile, not a generic list. If loud noise isn’t the trigger but bright light is the one, prioritize sunglasses over earmuffs. Test any new item at home first.
Pro Tip: Keep the top three items, earmuffs, snack, and visual schedule, in a top pocket or a child-worn mini backpack. Run a 60-second checklist the night before so morning-of stress doesn’t compound the outing itself.
How Do You Research a Venue Before an Autism-Friendly Outing?
Start online, then verify in person. Search the venue’s website for sensory hours, accessibility pages, or accommodation policies, and check for video walkthroughs on YouTube or the venue’s social media. Many attractions now publish sensory-friendly hours, quiet zones, and sensory kits directly on their accessibility pages, and museums in particular have gotten better about listing this information publicly over the past few years.
If you can, do a solo recce, a pre-visit without your child. This is considered close to a gold standard step because visiting alone identifies parking realities, the quietest entrance, and refuge spots that never show up on a map. During your recce, note:
- Which entrance has the least foot traffic
- Where restrooms are relative to high-traffic areas
- Any sources of sudden or repetitive noise (hand dryers, alarms, PA announcements)
- Lighting changes, flickering fixtures, or dim tunnels
- At least one quiet corner, bench, or side room you could retreat to
A structured recce approach that scans sound, light, layout, and smell in advance consistently reduces day-of surprises, according to sensory-friendly outing guidance built specifically around this method.
Don’t assume a venue without advertised accommodations is a dead end. Call or email ahead using a short script:
Staff who never publish sensory accommodations will frequently make them anyway once asked directly. This single email often does more good than an hour of internet research.
Build your exit plan before you leave the house, not once you’re overwhelmed on-site. Name the actual retreat spot, “the bench near the north entrance,” not just “somewhere quiet,” and have a transportation backup in case you need to leave faster than planned.
Pro Tip: Save every venue’s sensory map or accessibility contact in your phone under a single folder. Next time you plan an outing there, you skip the research step entirely.
What Should You Do When You Arrive at the Venue?
Arrival sets the tone for the entire outing. A rushed, chaotic entrance almost guarantees a harder afternoon.
Establish your arrival routine. Arrive slightly before or during an off-peak window if the venue offers early entry. Give your child a moment to transition, some kids do best sitting in the car for two minutes before walking in, others need to move immediately. Review the visual schedule together at the entrance so the first steps feel expected, not sprung on them. Pick your “base” location early, a bench, a table, a shaded patch of grass, somewhere you can return to if things get loud.
Settling in works best in stages:
- Start in the calmest available area first, even if it’s not the main attraction.
- Introduce one preferred, low-stakes activity before anything new or stimulating.
- Layer in the more exciting or unfamiliar parts of the outing gradually, watching for signs of rising tension.
Timers and first-then boards earn their keep once you’re inside. “First the aquarium, then the gift shop” gives a concrete endpoint to an open-ended activity. Set a visible timer for waiting periods so “just a few more minutes” isn’t an abstract, anxiety-inducing phrase. Build in micro-breaks, even 90 seconds of quiet standing away from a crowd resets a lot of tension.
Staff communication matters more than most parents use it. A short, direct script works better than a long explanation: “My child has sensory sensitivities, is there a quiet room or a faster line available?” Confirm your exit route with a staff member if the venue has multiple exits, and ask where the nearest quiet space is the moment you notice your child getting overwhelmed, not after they’ve already melted down.
Pro Tip: Rotate stimulating activities with calm ones every 20 to 30 minutes. A loud, exciting exhibit followed immediately by another loud, exciting exhibit burns through a sensory budget fast.
How Do You Handle a Meltdown or Shutdown During an Outing?
Keep your response simple: prioritize safety, reduce sensory input, and use calm, low-demand language. A meltdown is not a discipline problem in the moment. It’s a nervous system that’s hit its limit.
Your go-bag should already have the tools ready: ear protection, the preferred comfort item, the visual schedule, a familiar snack, and a change of clothes. A well-stocked go-bag with these five categories is the difference between a two-minute recovery and a twenty-minute one, according to outing planning research from sensory-friendly outing specialists.
When a meltdown starts, work through this sequence:
- Move to a safer, less crowded space if you can do so without forcing physical contact
- Reduce sensory input first: earmuffs on, lights avoided, crowd noise minimized
- Offer a grounding phrase you’ve used before, consistency matters more than the words themselves
- Give a simple choice (“sit or stand?”) rather than an open question
- Leave the venue if the environment can’t be sufficiently reduced
Keep your language short and low-demand: “I’m here. We’re going to the quiet spot.” Skip explanations and questions in the acute moment. If a stranger or staff member intervenes, a single line usually helps: “He’s okay, he just needs quiet space for a minute.”
Establishing a specific, named retreat zone before you ever walk in the door prevents the scramble of hunting for somewhere calm while your child is already in crisis. Asking staff about a quiet room in advance preserves your child’s dignity and your own composure when it matters most.
If a meltdown involves any risk to safety, yours, your child’s, or bystanders’, leave immediately rather than trying to manage it in place. Jot a quick note afterward (time, trigger, what helped) so you can adjust your plan next time.
Afterward, give your child, and yourself, time to recover before deciding whether to continue the outing or head home. Rushing back into stimulation right after a shutdown often triggers a second one.
Building Visual Schedules and Social Stories for Outings
A visual schedule doesn’t need to be elaborate. Four to six steps, shown as simple photos or icons, usually covers an outing: leave home, arrive, main activity, snack break, leave. Real photos of the actual venue work better than generic icons because they set accurate expectations. Include a timing cue for anything with a wait (“we wait here for 5 minutes”) and one visible contingency step, “if it’s too loud, we go to the quiet spot,” so the exit plan isn’t a surprise if you need it.
First-then boards handle transitions in the moment: “First museum, then playground” turns a vague future into something concrete. Pair it with a physical timer for waiting periods longer than a minute or two.
Social stories work well for anything unfamiliar or anxiety-producing: arriving somewhere new, waiting in line, using an unfamiliar restroom, or leaving a fun activity. Keep them short, three or four sentences, written from your child’s point of view, and specific to the actual venue rather than generic.
Format options depend on what your child responds to best:
- A phone photo strip you swipe through in real time
- Laminated cards on a ring you can flip during the outing
- A printable one-page schedule you fill in the night before
Practice matters as much as the tool itself. Walk through the visual schedule at home two or three times before the actual outing so it’s familiar, not another new thing to process on the day.
Choosing Activities and Pacing the Day
Pick activities with predictable structure over ones with unpredictable stimulation. A nature trail with a fixed loop beats an open-ended playground with unknown crowd levels. Off-peak museum visits, shortened zoo loops, and quiet nature walks all tend to outperform crowded, high-stimulation options for a first few outings.
Build in movement and quiet time deliberately rather than hoping for the best. A 15-minute active block followed by a 10-minute quiet break, repeated through the day, keeps sensory input from stacking up unchecked. Some events build this in for you: the Zoofari Stroll includes designated sensory-friendly areas and safety zones, and specialized programs like scheduled sailing outings often run capacity-limited group times specifically so families aren’t navigating a packed, unpredictable crowd.
Let your child help choose the activity when possible, even picking between two pre-vetted options increases buy-in and gives them a sense of control over an unfamiliar day.
Pro Tip: Plan your first transition and your exit before anything else. An outing that ends on a strong note, even a short one, builds confidence for the next attempt far more than a long day that fizzles out badly.
Essential Gear for Autism-Friendly Outings
Four categories cover almost everything: hearing protection, sun protection, sensory supports, and organization.
Hearing protection is worth understanding before you buy. Look for NRR (Noise Reduction Rating) on US products, higher numbers mean more sound blocked. BANZ hearing protection built for sensory-sensitive kids is designed specifically around comfort for extended wear, which matters more than raw decibel reduction if a child refuses to keep them on. Fit matters as much as rating, a loose earmuff leaks noise no matter what the label says.
Sun protection deserves more attention than most autism outing checklists give it. UPF 50+ blocks over 98% of UV radiation, and a hat with the right fit stays on better than sunscreen stays applied on a squirmy kid. BANZ carries a few options worth knowing about: the Hello Sunshine Sunhat with Sequins works well for kids who like a bit of visual interest without it becoming a sensory issue, while the UPF 50+ sun hat with a toggle strap keeps the hat secure during active outings like playgrounds or beach trips. For kids who need a hat that folds down small for the diaper bag or backpack, the UPF 50+ sun hat with a pocket packs flat without losing its shape.
Sensory supports round out the kit: fidgets, chewables, and a compact weighted lap pad for car rides or waiting rooms. Introduce these gradually at home, not for the first time mid-outing, and let your child handle and test new gear before it goes in the go-bag.
Organization ties it together. Small labeled pouches inside the bag mean you’re never digging through everything to find one item during a stressful moment.
The BANZ Protect app adds a layer most checklists miss: real-time UV and noise monitoring from your phone, so you know before your child does that a space is about to get too loud or the sun exposure is climbing.
Pro Tip: Introduce any new earmuffs or hat at home for short stretches, five minutes while watching a show, before the actual outing. A step-by-step introduction approach works far better than expecting instant acceptance on day one.
Two Sample Timelines: Short Park Trip and Longer Museum Visit
Concrete timing beats vague intentions. Here’s how both a short and a long outing break down minute by minute.
| Time | Short Park Trip (30-60 min) | Longer Museum Visit (2-3 hrs) |
|---|---|---|
| T-15 min | Review visual schedule, pack go-bag | Check tickets, confirm early-entry time, review schedule |
| Arrival | Settle at a quiet bench, put on earmuffs if needed | Enter during off-peak slot, head to calmest exhibit first |
| Block 1 | 15 min active play (swings, slide) | 30 min low-sensory gallery, then a 10 min break |
| Break | 5-10 min quiet time on a blanket | Quiet lunch in a low-traffic area |
| Block 2 | 10-15 min second activity (sandbox, walk) | 30-45 min second exhibit block |
| Exit | Announce 5-min warning, then leave on a high note | Staged exit with a final calm activity before departure |
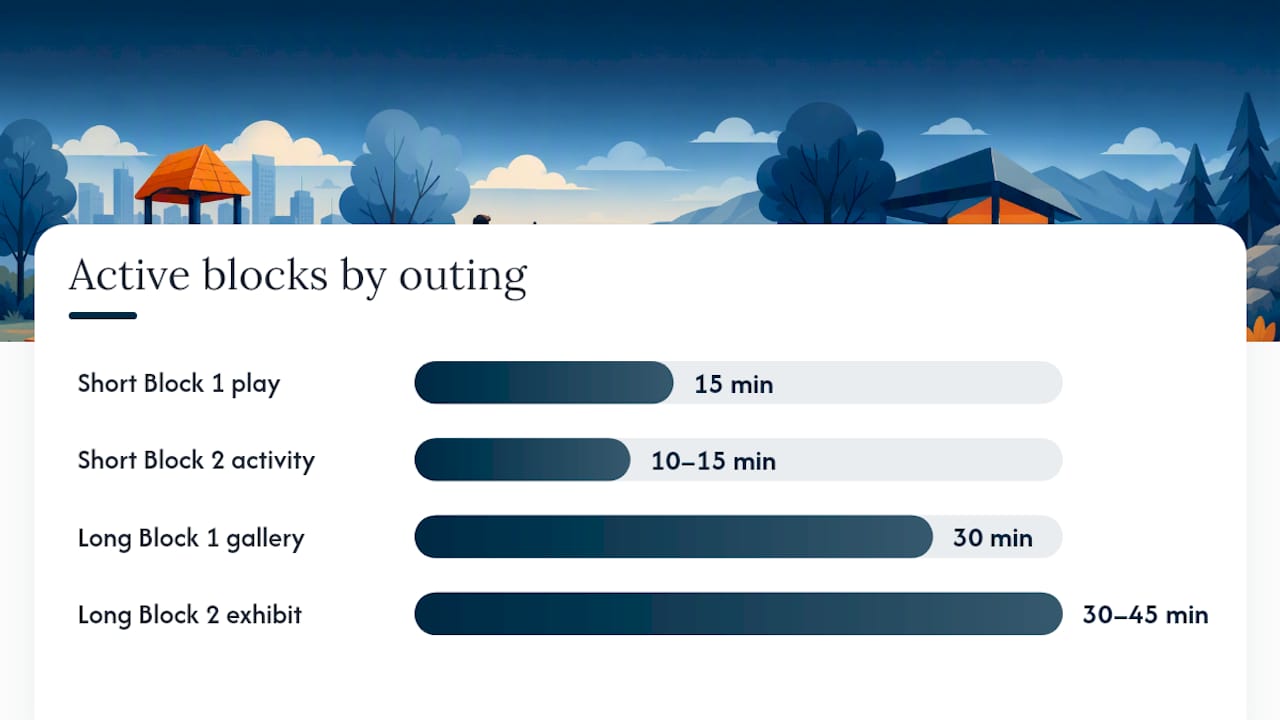
For the short trip, shorten either block if your child shows early signs of fatigue, rubbing eyes, repetitive movements, or refusing instructions, and head to the exit strategy immediately rather than pushing through.
For the longer visit, build in a scheduled sensory break every 45 minutes regardless of how things are going. Waiting for visible distress before pausing usually means you’ve already missed the window for an easy reset.
Check these three points every outing: at T-minus 15 minutes, confirm the go-bag is packed and the visual schedule is reviewed. At T-minus 5 minutes, confirm the exit plan and retreat spot are still viable given crowd levels. On arrival, do a 30-second gut check of noise and light before committing to the full plan.
How Do You Debrief After an Autism-Friendly Outing?
A short debrief right after the outing, in the car or at home, helps your child process what happened and helps you plan smarter next time. Using the same visual supports during debrief that you used during the outing reinforces the connection between the plan and what actually happened, which builds a clearer picture for future outings.
Ask simple, low-pressure questions, verbally or with a visual scale if your child responds better to that: What was your favorite part? What was hard? What should we do differently next time?
Jot down a quick note, even a single phone memo, covering three things: any sensory triggers that came up, which strategies actually worked, and whether staff were helpful. This takes 90 seconds and saves real planning time on your next outing.
Pro Tip: Pick one specific thing that went well, even something small like “used the earmuffs without prompting”, and name it out loud. Then schedule a short, similar outing soon after to build on that exact success while it’s fresh.
Editorial Perspective: What Actually Moves the Needle
Most autism outing advice treats planning like a checklist to complete once and forget. The research doesn’t support that. The three pillars, off-peak research, a named retreat spot, and visual supports, matter far more than any single gadget or app, and they need to be rebuilt for every new venue, not filed away after the first success.
Where conventional advice falls short is its obsession with filling time. Parents get told to plan every minute, and that instinct backfires. The advocates who study this closely are right that unstructured, child-led time isn’t wasted time, it’s what keeps sensory fatigue from compounding. A perfectly scheduled outing with zero breathing room often produces a worse outcome than a loosely planned one with a strong exit strategy.
If you take one thing from this guide, prioritize the exit plan before anything else. A named retreat spot, decided before you leave the house, does more to prevent a bad outing than any amount of packing or scheduling. Everything else, the go-bag, the visual schedule, the recce, exists to support that one decision: knowing exactly where you’re going if things get hard, and treating every outing, good or rough, as data for the next one.
Where BANZ Fits Into Your Next Outing
BANZ gives you one thing most sensory gear brands don’t: products built specifically to survive a real outing, not just look good in a photo. That means hearing protection rated for actual noise reduction, sun hats that stay on through a park visit instead of blowing off at the first gust, and a free app that flags rising UV and noise levels before your child feels overwhelmed by them.
If sun protection is next on your packing list, the UPF 50+ sun hat with a toggle strap is built to stay put during active outings, and the pocket-style UPF 50+ hat folds flat for the diaper bag or backpack when you need something compact. Parents dealing with noise sensitivity should start with the guide to NRR versus SNR ratings to understand what actually blocks sound before buying anything.
Browse the current sun hat and hearing protection lineup, add whichever category matches your child’s biggest sensory trigger, and check out today so it’s packed and ready before your next planned outing.
Frequently Asked Questions
What should be on an autism-friendly outings checklist?
The core items are a sensory kit (earmuffs, fidgets, or a weighted lap pad), a visual schedule, a named exit plan with a specific retreat spot, an ID/contact card, a familiar snack, and a change of clothes. Match every item to your child’s specific sensory profile rather than a generic list.
How far in advance should I research a venue?
A few days to a week works for most outings. Start with the venue’s website and accessibility page, then follow up with a call or email if sensory accommodations aren’t listed. A solo recce, if you have time, is worth doing the day before or a few days ahead.
What’s the best way to prevent a meltdown during an outing?
Prevention beats response. Build in scheduled sensory breaks every 20 to 45 minutes, keep hearing protection accessible at all times, and name a specific retreat spot before you arrive. Watch for early signs of fatigue, rubbing eyes, repetitive movements, refusing instructions, and pause before those escalate.
How long should a first autism-friendly outing be?
Shorter is better for a first attempt. A 30 to 60 minute outing to a familiar or low-sensory location, like a quiet park during off-peak hours, gives you a manageable test run before attempting a longer trip like a museum visit.
Do I need to tell venue staff about my child’s sensory needs?
It helps more than most parents expect. A short script, “My child has sensory sensitivities, is there a quiet room or early entry available?”, often unlocks accommodations that aren’t advertised anywhere on the venue’s website.
Sources
A few resources are worth bookmarking beyond this guide. The Sensory-Friendly Kids directory lists quiet hours, noise-reducing accommodations, and lighting details by city, which speeds up venue research considerably. Sensory-friendly guides published by tourism boards, like this Pittsburgh accessibility guide, show how individual museums and attractions handle quiet hours and sensory kits.
Use directories and event calendars the same way you’d check a weather app before an outing: as a quick reference before you commit, not a guarantee. Event pages for programs like the Zoofari Stroll or scheduled sailing outings often list registration windows and group times that change seasonally, so check the current page before you plan around them.
For gear questions specific to your child’s needs, BANZ’s resource on managing noise sensitivity is a solid next stop.
- Article: planning guidance on sensory-friendly outings (UNMC)
- The Ultimate Packing List for Days Out with Autistic Children (Inclusive Teach)
- Zoofari Stroll event page (Autism United)
- Sailing Adventure event page (Pathfinders for Autism)
Recommended
- Sensory Friendly CelebratSensory-Friendly Celebrations with Kids: A Family Planning Guideions with Kids – BANZ® Carewear USA
- Family Travel & Outdoor Event Guides for Kids | Go With BANZ – BANZ® Carewear USA
- The Complete Family Beach Packing List for Parents – BANZ® Carewear USA
- Sensory Support for Families | Sound-Sensitive Kids | BANZ® – BANZ® Carewear USA